

Cedar shakes are a beautiful, timeless feature that can elevate the appearance of your home. However, over time, these natural wood shingles can weather, split, or deteriorate, requiring maintenance or even replacement. As a trusted painting professional and realtor, I’ve worked with many homeowners facing this dilemma. Here’s what you need to know about cedar shake replacement and painting to keep your home looking its best.
When to Replace Cedar Shakes
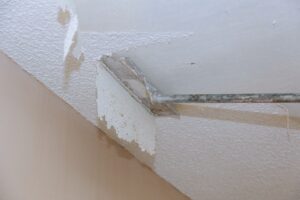
Cedar shakes are known for their durability, but they aren’t indestructible. Exposure to harsh weather, moisture, and UV rays can lead to cracking, curling, or rotting. If you notice multiple shingles that are visibly warped, split, or discoloured, it might be time for a replacement. In some cases, small repairs can extend the life of your shakes, but when significant damage occurs, replacing entire sections may be necessary.

Steps in Cedar Shake Replacement
- Inspection: Before jumping into repairs, a thorough inspection is key. This allows us to assess the extent of the damage and plan accordingly. We check for signs of rot, water damage, or insect infestation.
- Removal: Damaged shakes are carefully removed, ensuring that we don’t disturb the surrounding area. This requires precision to avoid breaking nearby shakes.
- Replacement: New cedar shakes are installed, and matched as closely as possible to the existing ones in terms of thickness, texture, and colour. The new shakes are secured using corrosion-resistant nails to prevent premature wear.
- Sealing: Once the shakes are in place, a quality sealant or primer is applied to protect the wood from moisture and UV damage.

Painting Cedar Shakes
Many homeowners opt to paint their cedar shakes for a fresh, updated look or to match a new colour scheme. Here’s how we approach it:
- Surface Prep: Proper preparation is crucial. We start by cleaning the shakes, removing any dirt, mildew, or old, flaking paint. If the shakes are new, we let them weather for a few weeks before painting to allow the natural oils to settle.
- Priming: Cedar is a porous wood that can absorb moisture, which can lead to peeling or bubbling paint. Applying a high-quality, stain-blocking primer ensures good adhesion and adds a protective barrier.
- Painting: We recommend using a 100% acrylic paint, as it provides the best protection against the elements. Two coats are generally applied for even coverage and long-lasting results. We have also used a quality acrylic solid stain for similar results!
- Maintenance: After painting, regular maintenance is key to keeping your cedar shakes in top shape. A good rule of thumb is to inspect them every couple of years, touching up any areas where paint has started to wear.
Cedar shakes offer unmatched charm and warmth to a home, but they require a bit of care to stay beautiful. Whether you’re replacing damaged shakes or refreshing them with a new coat of paint, investing in high-quality materials and proper techniques will ensure your home’s exterior stays resilient and stunning for years to come.
As always, if you’re unsure about any part of the process, it’s best to consult with a professional. We’re here to help make sure your cedar shakes look their best and stand the test of time.
